BSA B175 Bantam. . . . yet
again
Yes - I've only gone and bought another one
Having sold my
B175, then also selling my
D14/4S, it left a bit of a Bantam shaped hole in the garage.
I know I sold the other two 'cos I didn't use 'em enough, but I
did rather miss the few occasions when I needed a "Bantam fix",
and besides, I'd also miss the folks from the owners club on the
national rally and other events. Anyway, whilst
looking on the forum of the Bantam Owners Club I noticed a B175
was up for sale. OK, so it wasn't a running machine and it
was over 200 miles away - but what does that matter ? I
don't mind travelling, in fact I quite enjoy it, and I do get
pleasure from working on bikes as well as riding 'em. If
only I'd have known . . . looks like I will be getting a lot of
"pleasure" with this one - still, time spent in the garage is
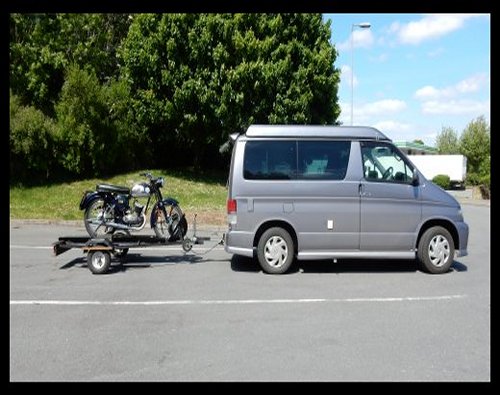
always time well spent. So on Tuesday the 5th of May, I
hitched the trailer to the Bongo and set off for Kent - and by
three o'clock in the afternoon I was back home with something
Bantam shaped.
Right,
the first thing was to take a quick look around
and see what obviously needed doing. First
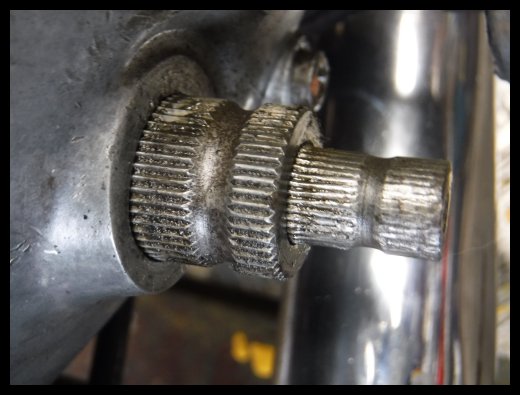
thing was the gear lever spinning on the shaft.
Oh dear, those splines have seen better days.
Luckily I have a decent four speed gear change
shaft in the garage.
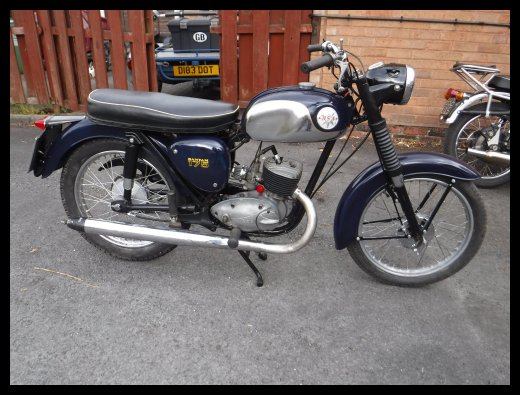
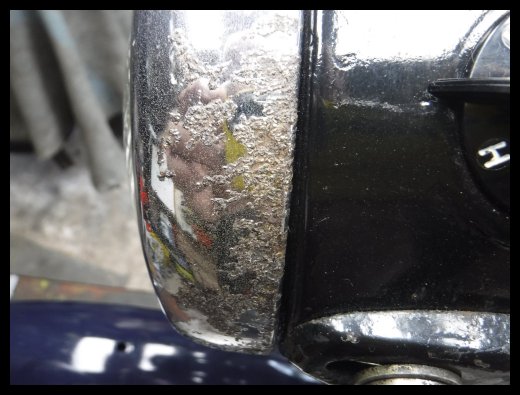
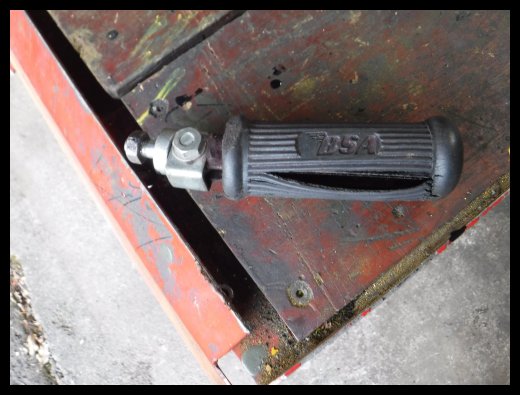
Next things to immediately jump out was the
chrome ( or lack of ) on the headlight rim and the perished footrest rubbers.
Once again, an easy fix.
I did rig up my remote fuel tank and have a
quick couple of kicks when I got the bike home, but it showed no signs of
wanting to start and the kickstart kept jamming when trying to kick it.
That will be looked at later.
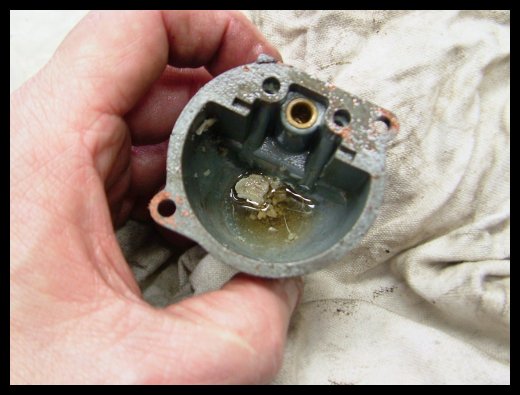
Right, first thing is, take a look and make
sure the carb is clean. Oh dear - the inside of this carb has not seen
daylight ( or petrol for that matter ) for quite a while. The bottom of
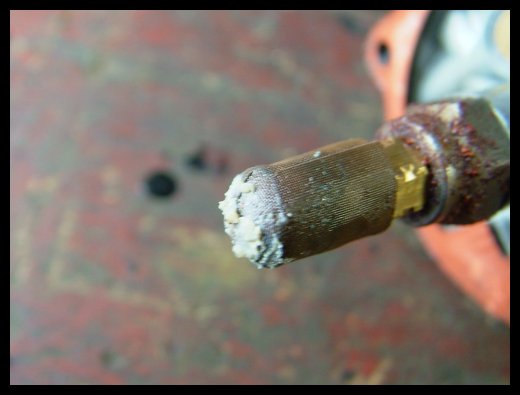
the float bowl was full of crap and there was what looked like a cover of some
description over the main jet. This cover turned out to be a fine gauze
which had such a build up of crud on it that it gave the appearance of being
solid. I'd never seen gauze on a main jet before. It was probably
put on in the hope that it would somehow act as an additional fuel filter . .
.but any restriction in the main jet will only cause the engine to run weak and
most probably seize. No wonder the bike wouldn't even attempt to run.
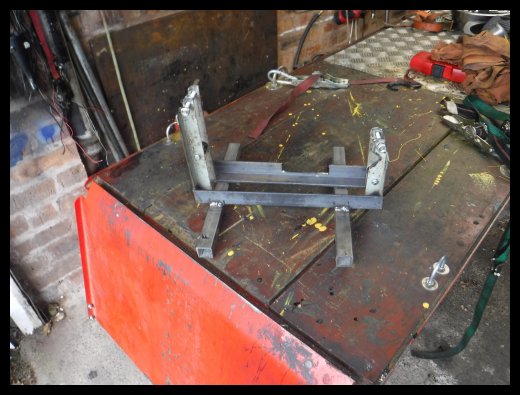
When I sold my D14 last year, I also sold my
spare B175 engine - and this engine was sat on an engine stand. Seeing as
I made the stand from bits and pieces from in the garage, I thought it would be
a good idea to build another one before I go much further. So a few bits
were cut, drilled and welded, and I now have something to hold the engine whilst
I work on it.
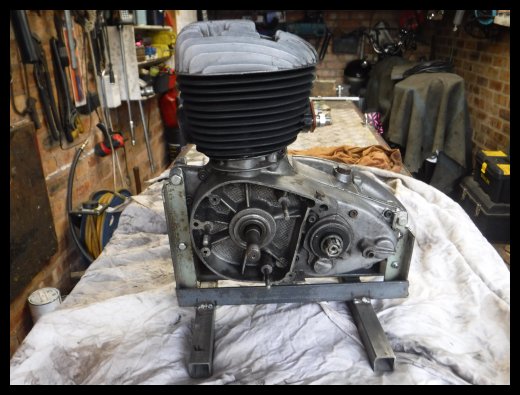
Now
that the engine is sitting happily on its stand ( can you sit on a stand ? ) it
was time to dig further. Next obvious thing was the up and down movement
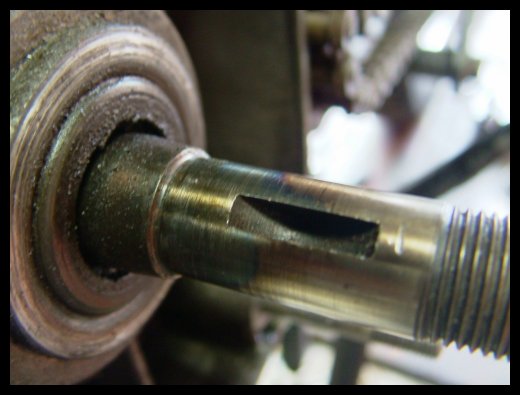
of the crank shaft on the alternator side. Looks like a set of main
bearings will be needed - and if the mains have gone, you can bet the oil seals
have gone too. There was a bit of bluing on the main shaft, this could be
down to the alternator rotor spinning because the woodruff key which prevents it
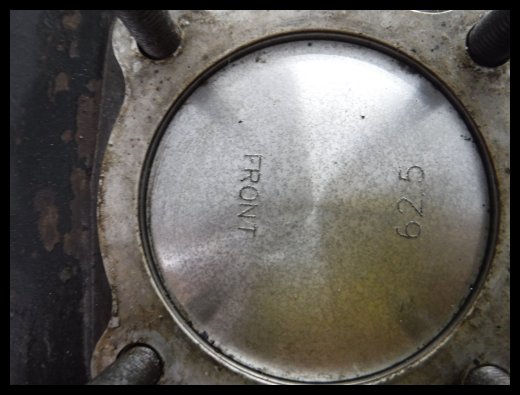
from doing so was sat in the bottom of the casing. I took the head,
barrel and piston off next - it's a new +040 piston and the rebore has been done
by PJ Engineering, a company local to me. If PJ have done it, then that's
one thing I won't have to worry about - they are good at what they do. I
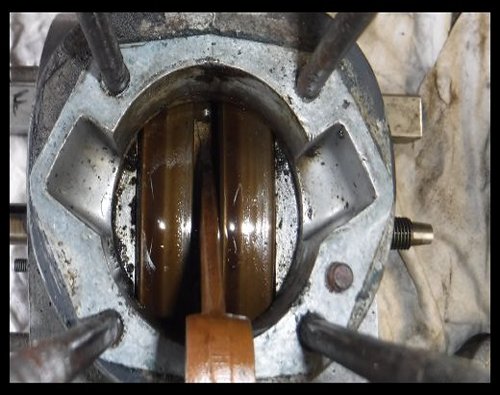
spun the crank via the con rod, and you could hear the rumble of the worn main
bearings. I also noticed a lot of clean oil coming round with the
flywheels, this also makes me think the oil seals are badly worn.
Let's see what delights await in the other side of the
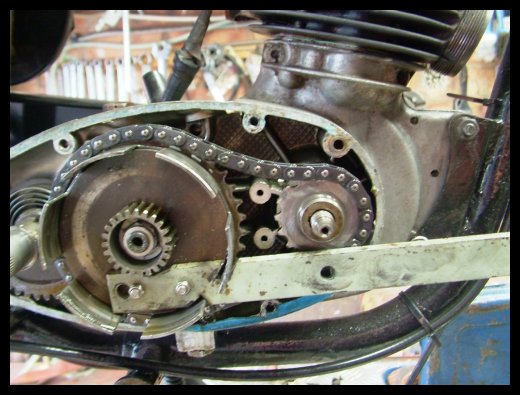
engine. First thing I noticed was the worn primary chain - it was also an
endless chain, so both the clutch drum and the engine sprocket really need to
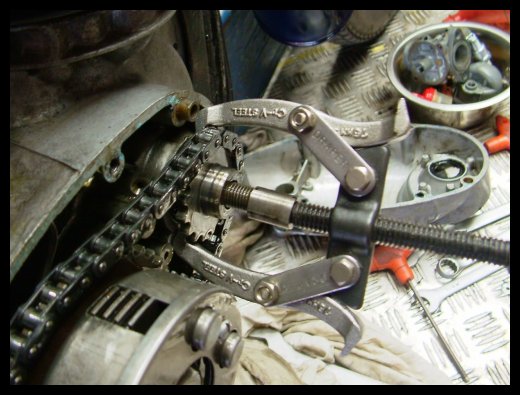
come off together. Now here's a little tip: When using a puller to remove
the engine sprocket, put the points cam back on or you will stand a very good
chance of breaking the end of the crank shaft - I know more than one person
who's ended up with a broken shaft. The clutch was next to be pulled
apart. The plates were well stuck together - it's been a long time since
this clutch disengaged. I used my home made clutch drum locking tool to
remove the clutch centre nut - easy enough to make, just an old friction plate,
a couple of nuts and bolts and length of steel strip. The kickstart ratchet
seemed ok - I'll have to find my spare quadrant and compare it with the one I
took from this engine. The leading tooth looks worn, but I'll leave
judgment until I compare the two.
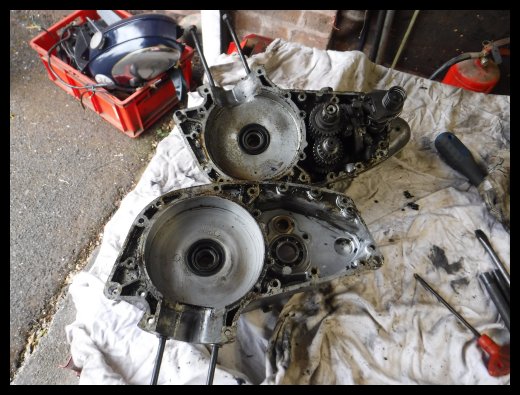
Next job was splitting the crank cases.
This engine has been apart before because all but one of the fixing screws had
been replaced by Allen bolts. Luckily all of the bolts came out easily and
none of the threads seemed damaged. There was one bolt missing and one
original cross head fitted. I don't know what had been used as jointing
compound, a barrel of tar springs to mind. There was a load of the stuff.
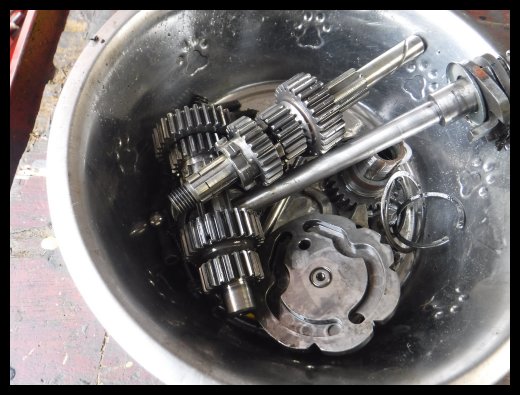
It was in the gearbox and stuck in all the webs of the castings. Cleaning
that out will keep me entertained, or I might just get all the cases vapour
blasted. The gearbox seemed to change through all four gears easily
enough, and although some of the gears looked worn, I don't think they will need
replacing. Once again, I have a spare four speed box living in a biscuit
tin in the garage. I tend to keep it as a reference when looking at other
people's gearbox problems.
Time to play with fire, and get the crank
cases hot enough to make removing the bearings easy. As I thought earlier,
all the oil seals were badly worn, so they will be replaced along with the main
bearings and the gearbox output bearing. It makes sense to change it
whilst the engine is apart . . . along with the gear change return spring.
A new spring costs less than five quid, but it's an engine out job to fit one.
Right, that's enough for now. It's only taken a couple of days to get this
far. I'll press on with the rolling chassis whilst waiting for engine
parts.
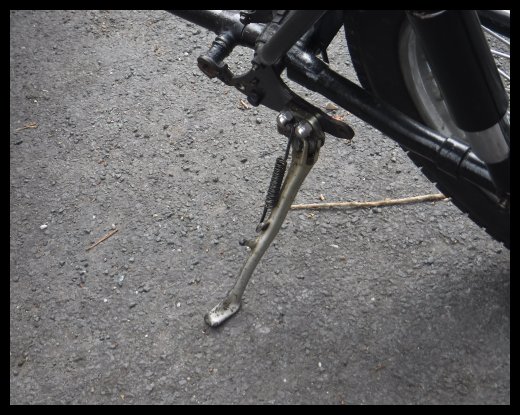
A couple of little things today - first off was fitting a
side stand. The type that fits onto the front engine mounting bolts are
not very good. Being at the front of the bike means that there's a good
tendency for the front wheel to lift off the floor and the whole plot to come
crashing to the floor . . this is even more so if you have a carrier fitted and
attempt to load camping gear or such like. Fortunately those nice people
at Kawasaki make a very nice side stand for their ZZR600 - which just happens to
fit nicely on the pillion footrest mounting plates of a Bantam. The other
thing was the bike's log book arriving, not bad considering I only picked the
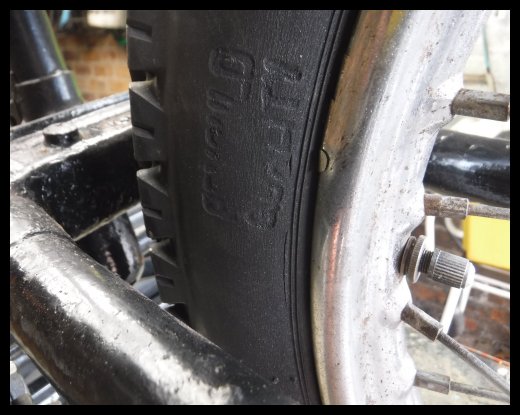
bike up a week ago today. Whilst working away I noticed something on the
rear tyre. Some lettering that someone in the past had tried to remove
with sandpaper or similar. I know the photograph isn't the best, but you
can make out the words "Remould Quality" Now I never knew they made
remoulds for bikes - cars yes - I used to have 'em on my Land Rover many years ago.
As far as I'm concerned, tyres and brakes are something that I always fit new.
You don't know if that tyre has been rammed up a gutter, or run flat for any
length of time.
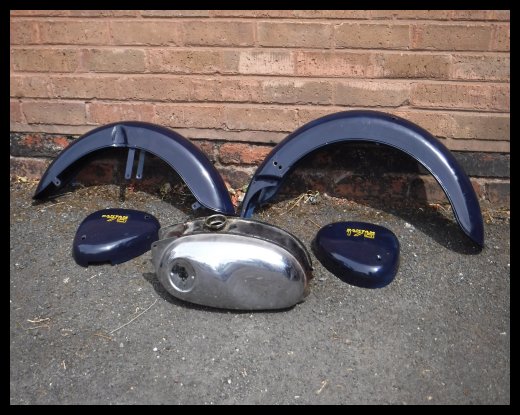
Whilst waiting for bits, I carried on with
making the bike look generally nicer. First off was all the tinware that
was to be powder coated in whatever colour I fancy - there's a good chance it
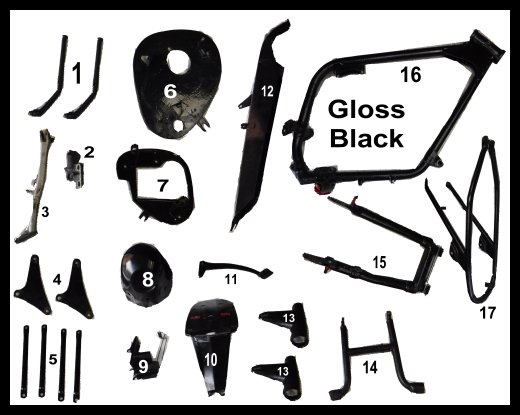
may be purple. The rest of the bits will be gloss black. I tend to
make a numbered list of what goes to be coated, that way both you and the powder
coating company have a list of what's what.
As with every other old bike I own,
this will be converted to 12 volts. This improves reliability
and give a greater choice when it comes to bulbs, plus most car
spares places sell 12 volt bulbs, but very few stock 6 volt
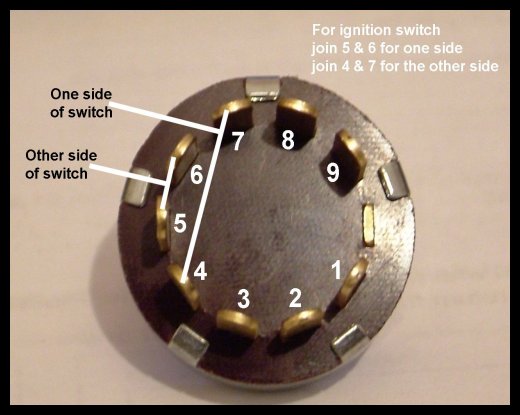
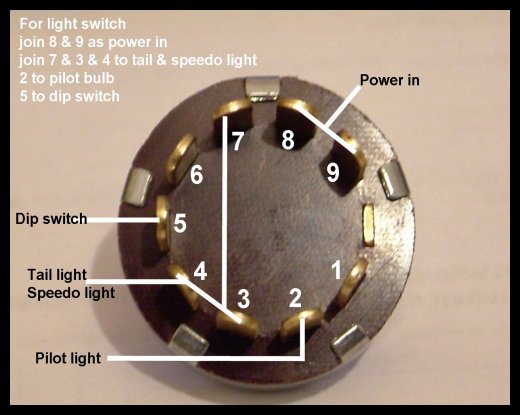
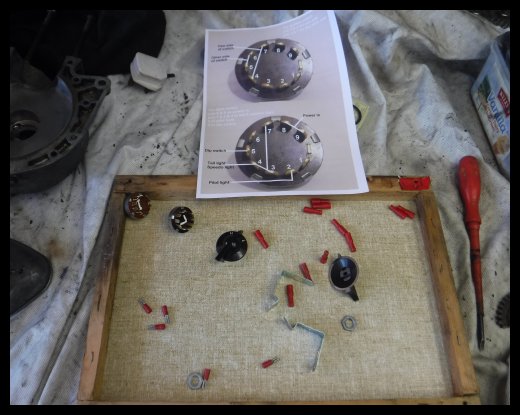
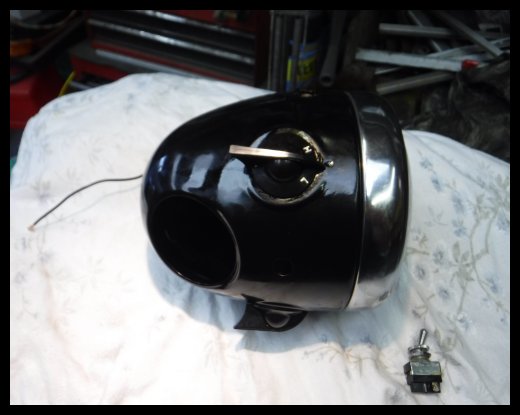
items. I tend to use a simple key switch for the ignition and a
simple toggle switch for the lights - doing away with the "pilot
light". . . . now a friend of mine wanted his bike converted to
12 volts but wanted to keep the standard switches in the
headlight shell. A few minutes messing around with my test
meter and a few wires with crocodile clips on the end solved
this problem. Just to prove I practice what I preach, I will keep the standard
headlight mounted switchgear - I will probably fit a "hidden"
key switch if I can find a suitable place to fit one - as you
know, there ain't a lot of spare room on a Bantam.
When I bought this bike I was told that
the kickstart sometimes locks and the bike has to be put into
gear and rocked in order to free it. I suspected the
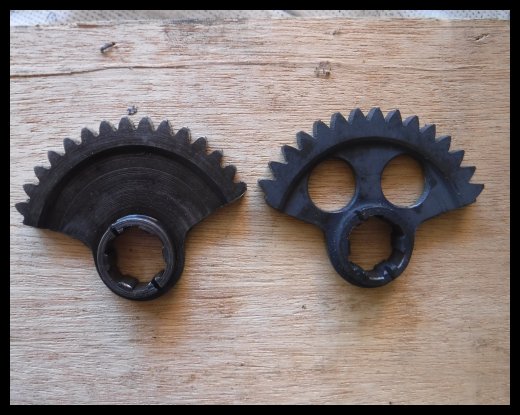
leading tooth on the kickstart quadrant had worn - and as it
turned out, I was correct. Looking at the quadrant it
seems like it could be turned the other way round so the unworn
trailing tooth now becomes the leading tooth. I did ask
the question on the Bantam Club Forum, and "BantamBaz" gave me
the answer. "No - there is an offset on the casting"
Ah well, time to buy a new one - they ain't expensive.
Having sorted the kickstart quadrant
out, it was time to carry on with putting the engine to rights. By now my
new bearings and seals had arrived, so armed with my trusty blowlamp I set about
warming the cases up to make fitting the bearings easier. OK - I could
have bunged them in the oven for twenty minutes, but I like playing fire.
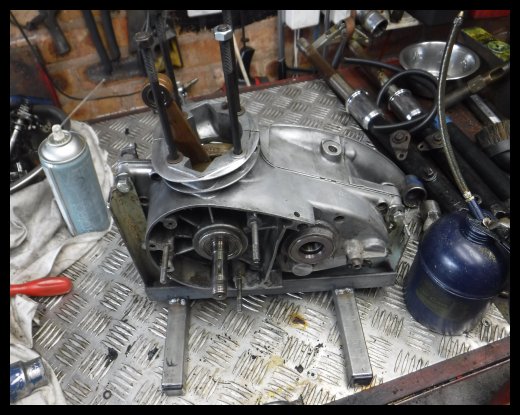
Now that the bearings and seals were fitted, I dropped the
crankshaft in and made sure all was well. ( famous last words ) I didn't fit the gearbox
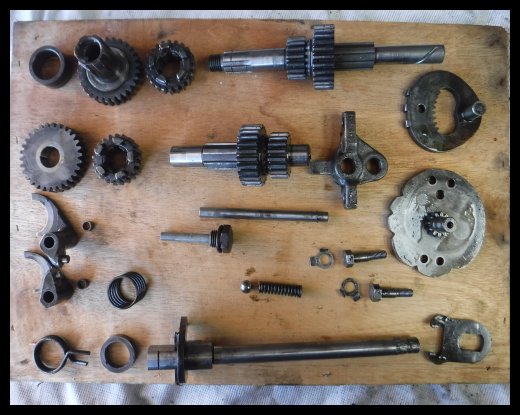
internals - there's no point if you have to keep taking the two crankcase
halves apart to fit shims on the crank. . . . besides, I want to take a look at
the gearbox internals before refitting them.
Speaking of bearings - I next turned to the
wheels. The chrome on the rims is non existent and has been painted over.
The spokes are loose, and a few are bent . . . so I reckon there's a good chance
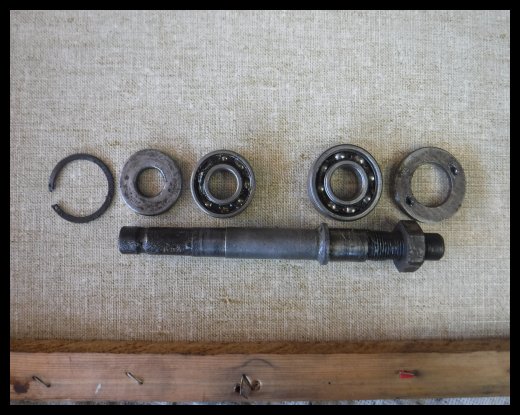
that the wheel bearings ain't much better. A useful tip in these days of
smart phones and digital cameras is to photograph the components in the order
they come off. This makes putting it all back together again a less
daunting task. "Did that spacer go behind or in front of the bearing ? "
Refer to the photograph and all becomes clear.
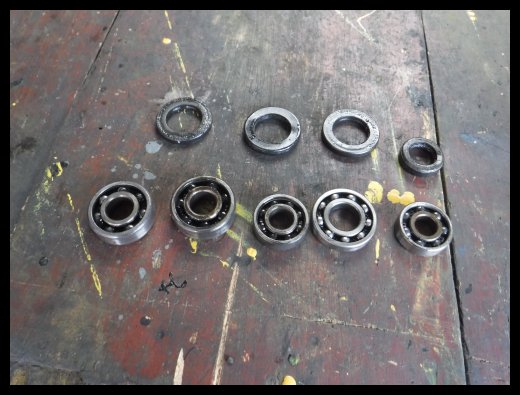
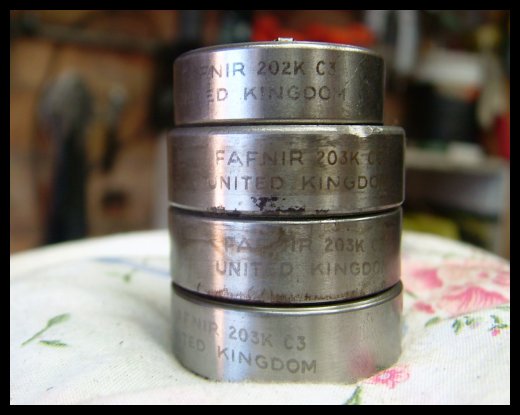
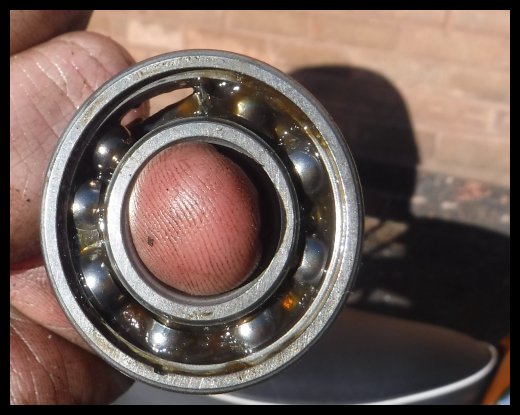
As you can see from the picture, one of the wheel
bearings had started to break up. Looking at the identification marks on
the bearings, I wouldn't be surprised if they were the original fitment.
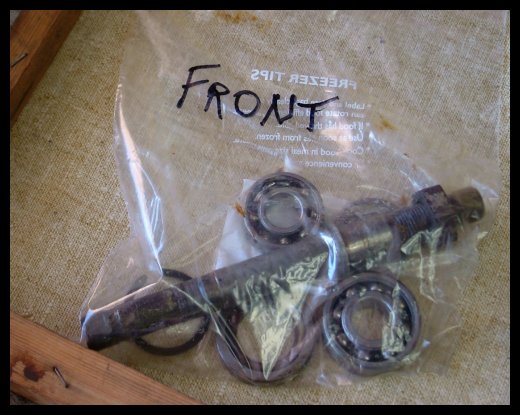
Another useful little tip is - buy a pack of plastic freezer bags - then put
components which group together in a bag . . . and label it.
Remember when I dropped the crankshaft in to
make sure all was well ? Well it wasn't - the right hand flywheel
was running out of true by around.040" Once again I just happened to
have a spare crankshaft. I'll get the other one repaired at my leisure.
The cylinder head was treated to a bit of very mild sand blasting - it cleaned
up quite well, but there is a fair bit of pitting on some of the fins. The
combustion chamber is fine.
Does this mean the engine is done ?
Indeed it does. The only thing I could have changed were the clutch plates
- they still have a lot of meat left on them, but I don't know how well the
bonding will stand up. I dare say I'll find out when the time comes -
besides, changing clutch plates isn't exactly an all day job. The
gearbox seemed ok - nothing too badly worn, so that went back in with a new
return spring and a shaft with decent splines on it. Main bearings, oil
seals, primary chain, and kickstart quadrant are all new, as is the piston and
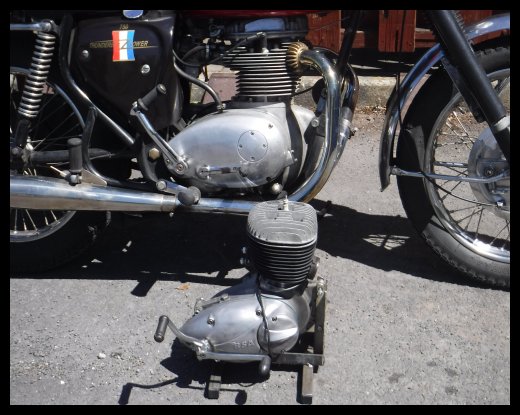
bore. I sat the engine outside in the sunshine, and showed it what it will
grow up into one day. The big egg and the little egg.
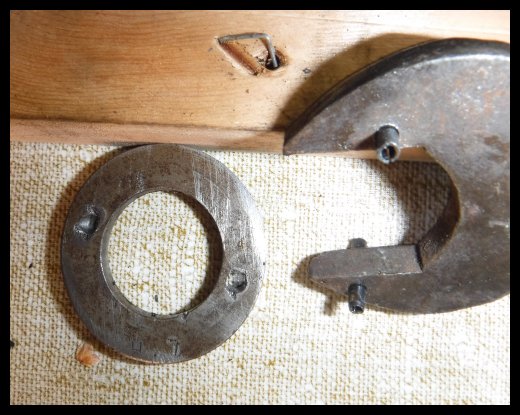
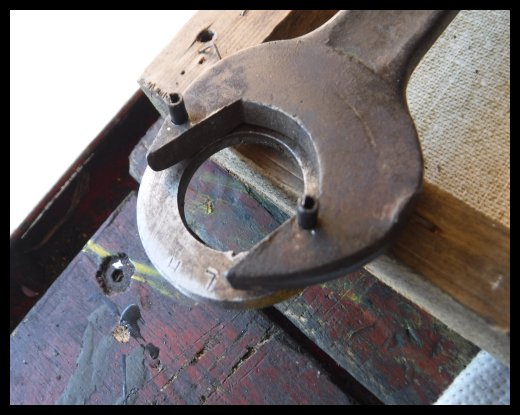
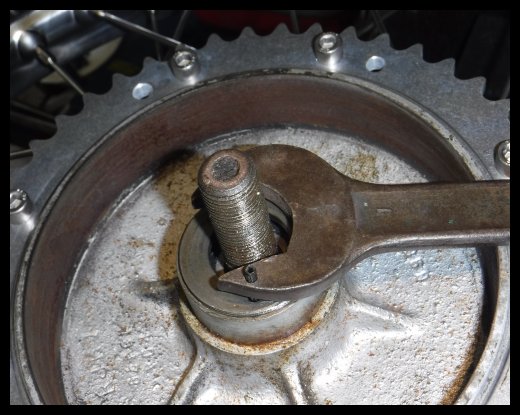
Now here's a thing. When it comes to
undoing the bearing retaining rings in the front and rear wheels, why do people
think a hammer and centre punch is the best way of undoing them ? Get
yourself an old spanner that's about one and a half inches wide and lash out on
a couple of 3mm ( one eighth for us old buggers ) roll pins - you can get a set
of assorted sizes for under a tenner, and they always come in useful. Now
take your retaining ring and file off the mess made by the centre punch wielding
butcher, then drill the holes right the way through. Using the retaining
ring as a "drilling jig", drill two holes of the correct diameter for your
roll pins in the spanner. Congratulations - you have now made a peg
spanner. No more hammering away at things that were never meant to be
hammered on. . . . and you can still use the spanner for its intended use
( at a push ). This will come in useful later on when I get the rebuilt
wheels back.
Whilst other bits are
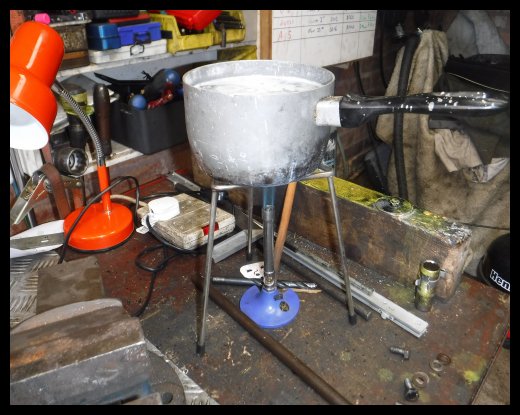
away being sorted out, it's time to turn to the carburettor.
Ultrasonic cleaning is good, but an ultrasonic cleaner large
enough for a carburettor body is a tad expensive. Time for
another little useful tip. Get an old saucepan, fill it
with water, then add washing powder . . . and give the
carb a good boiling. The agitation of the boiling along
with the cleaning of the washing powder will shift any nasty
things which are lurking within the carburettor drillings.
A blow through with carb cleaner afterwards, just to make sure
everything is clear, and all being well you should have a carb
which does what it's supposed to. With the ethanol in
today's fuel, it's a wise move to fit a Viton tipped needle, and
possibly the new "stay up" float. Once again, these items
can be fitted in fifteen minutes at a later date, should the
need arise.
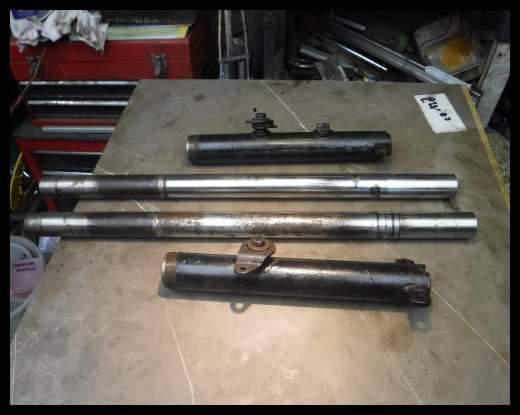
Next on the list - front forks. Oh dear, those
stanchions have seen better days. Being a
B175, they have "heavyweight" forks. I
suppose they are heavier than the forks on the
earlier models, but the forks on the Sport and
Bushman are even heavier - in fact they are the
same forks as fitted to the Starfire.
Anyway - B175 fork stanchions - virtually every
dealer is showing them for sale, but none of
them have them in stock. This calls for
plan "B". Get the original ones
refurbished. Brook Suspension seem to have
a good reputation, so that's where I've sent
them . . . time will tell. Speaking of
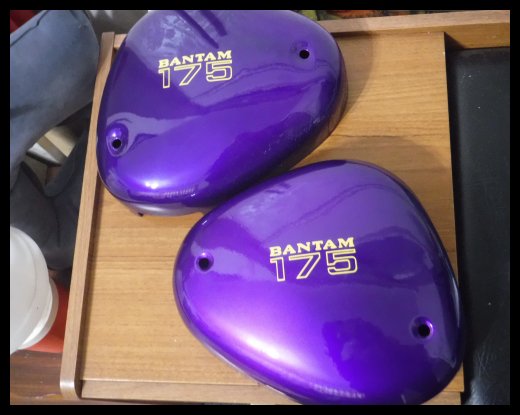
refurbishment, the powder coating has now come
back, and I must admit, I'm more than pleased
with the result. OK, it's a colour that
can never be matched - it's a "made up" colour.
Silver was done first, then a fine coat of the
secondary colour applied, this gives an almost
metallic finish.
Now for folks thinking that "doing up" a
Bantam is cheap - it costs as much to build a
wheel for a Bantam as it does for a Vincent.
OK, other bits may be cheaper, but so far the
bill for this bike is up over £1000, and I ain't
factored in the rebuild of the wheels and a new
exhaust system yet. Fortunately the rewire
won't cost me much - I still have most of what I
need from the last couple of bikes I rewired.
I can't do much with the frame
until the wheels are fitted -
and I can't fit the wheels until
the forks are fitted - do you
see where I'm going with this ?
One thing I can fit is the
swingarm. The bushes don't
show any signs of wear, and the
spindle looks good. I have
a feeling the bushes and spindle
are new items, mainly because
the bolts which hold the spindle
in place are cycle thread with a
pitch of 26 threads per inch.
The correct spindle for a B175
should be a much coarser thread.
You can fit the spindle with a
bit of persuasion with a large
hammer, but a press makes things
a lot easier.
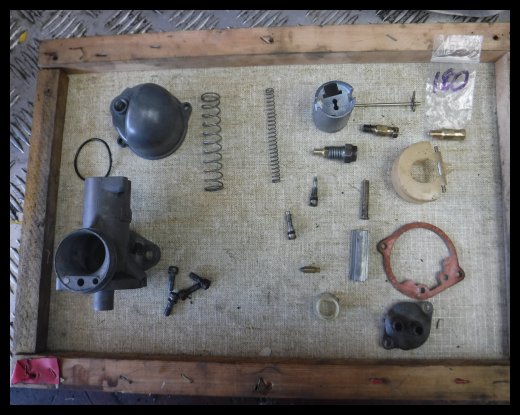
Having got the swingarm back in, the next item was the carburettor.
By now my new 180 main jet had
arrived, so it was just a case
of putting all the bits back
where they came from.
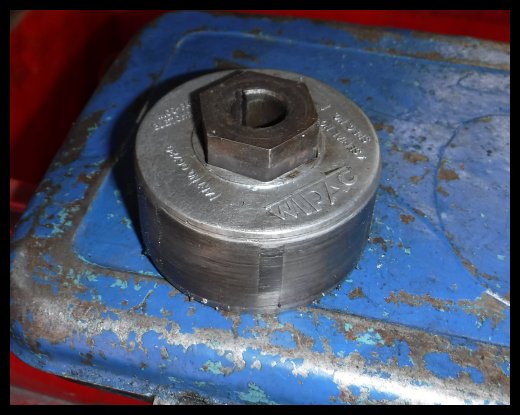
Time to take another look at the
electrics. It seems the
rotor is an accident waiting to
happen. The centre has
come loose, and if those bits
start flying apart when the
engine is running, then you
could be looking at a big repair
bill. . . so this "electric
grenade" has to go. I do
not have a spare rotor, and it
seems there are none for sale,
so that leaves three options: 1
- try and make an adapter sleeve
so I can fit a conventional ¾
inch rotor. 2 - try and obtain a
new rotor. 3 - change the entire
system for something more
modern.
Whenever I've done work for other people, usually on the
flywheel magneto Bantams, I've
always advised them to fit
Electrex World systems.
Other systems are available, but
I've never had any problems with
Electrex World units, and when I
needed advice, I found them to
be more than helpful - even to
the point of trying different
ignition boxes on a bike I
trailered down to them.
So, after taking my own advice,
I've ordered a new charging /
ignition system.
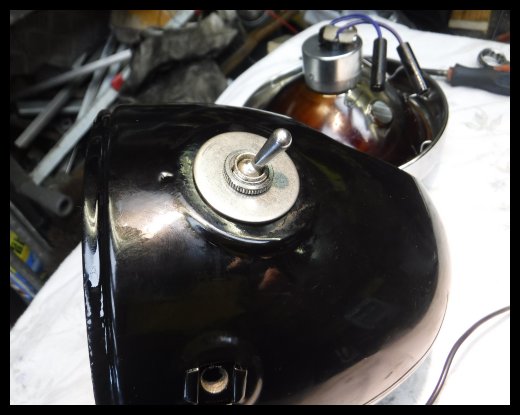
This new system means that the original switch gear in the
headlight is no longer suitable
( OK, so the light switch is )
so I've reverted back to that
old faithful - the keyed
ignition switch and the toggle
light switch.
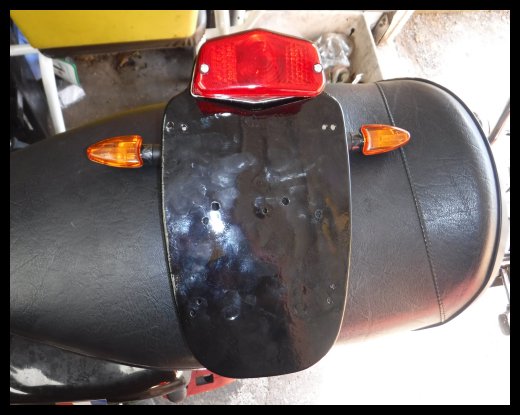
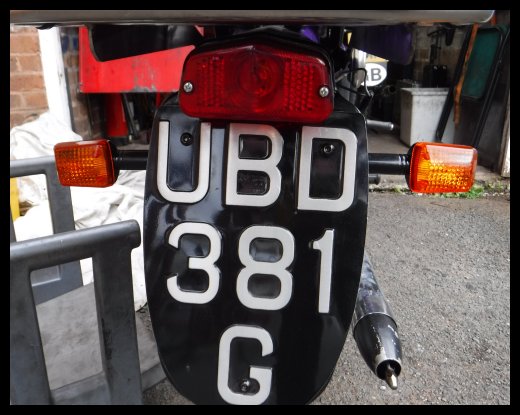
I've also made a start on fitting indicators to the rear using a stainless steel bracket
which attaches behind the number
plate. This means that
should you wish to remove the
indicators and revert the bike
back to original, then it's
simply a matter of undoing a
couple of bolts. I also
changed the rear light for something that actually fits the number plate
mounting bracket.
The petrol tap I normally use is one for an Indian Enfield - I've got one on my
B31, and on my Guzzi, and it works well. Seeing as I had both the
Bantam tank and the B31 tank on the bench following re-sealing with POR15, I
grabbed the tap I'd used on the B31 tank and made sure there was no sealant left
in the threads. I then fitted the petrol tap back in place. Seeing
as I had the tap in my hand, I drilled out the Bantam tank and tapped the hole
in readiness for the new petrol tap. Oh dear, that seems a bit loose.
It turned out that my new petrol tap had a ¼ inch BSP thread,
but the other tap ( in the B31 tank ) is a 3/8 BSP. Time for plan "B".
I've ordered a brass bush with a 3/8 BSP male thread and a 10mm hole in the
centre - I've also ordered a ¼ inch BSP tap and a suitable tapping drill.
Hopefully it will all work out in the end. It wouldn't be as much fun if
you didn't make the odd cock up now and again ( or again, and again, and again,
in my case )
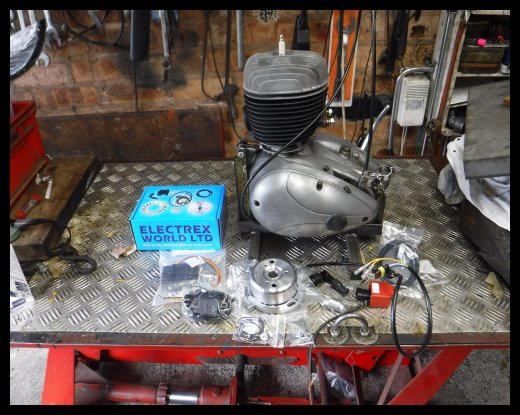
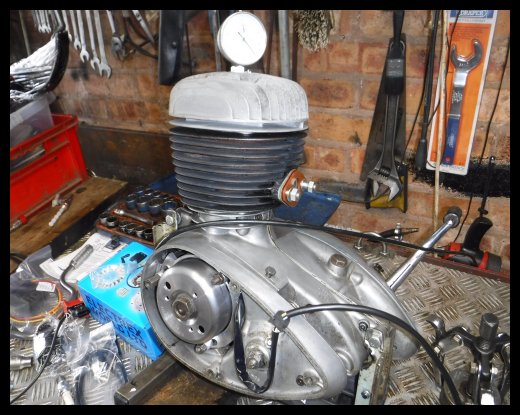
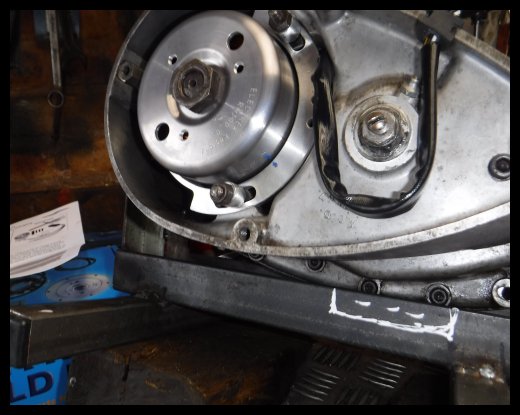
The Electrex World kit has now arrived, so it was off with the
old, and on with the new. It's a simple system to fit, almost as easy as
fitting the standard rotor and stator. With the piston at top dead centre,
you just line up the two blue timing marks and it should be good to go.
It might seem an expensive bit of kit, but if you price up a new stator and
rotor, then add the cost of a regulator / rectifier, and add electronic ignition
on top of that, you'll find there's not a lot of difference, price-wise.
Having fitted the new rotor and stator, I couldn't really test it without the
engine being in the frame, and that isn't going to happen just yet. I have
no wheels and no fork stanchions, so until they arrive, there's not much I can
do.
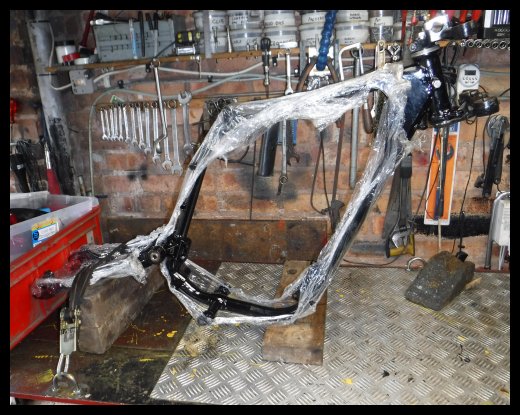
Still awaiting forks and wheels, so let's get on with a few more
bits. First off was fitting the steering head, complete with 48 new ball
bearings. Whilst I had the frame up on the bench, I "dry fitted" the inner
panels for the toolbox and air filter, along with the battery carrier - which
has been modified to take the different shape of the new 12 volt battery.
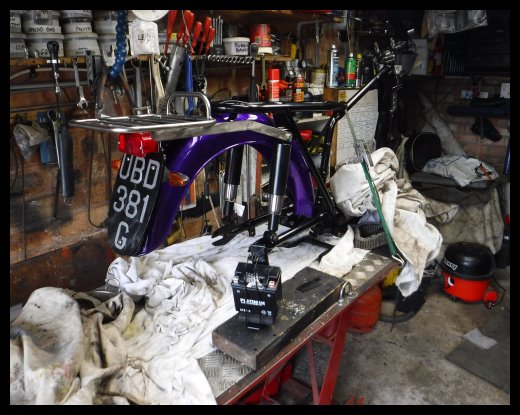
Next up was fitting the rear mudguard, but not until I had fitted the rear light
bracket and the number plate. The whole mudguard / number plate / rear
light assembly was then wired up, terminating in a six way plug connector.
This makes life much easier when it comes to wiring the rest of the bike up,
plus it makes life simpler should you ever need to take the back end off again
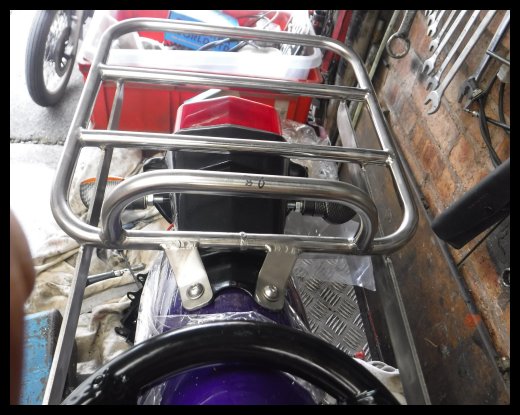
for any reason. Now that the mudguard is in place, I next fitted the
carrier. A stainless steel item which actually fitted the bike without any
modification, so well done "Classic Bike Racks".
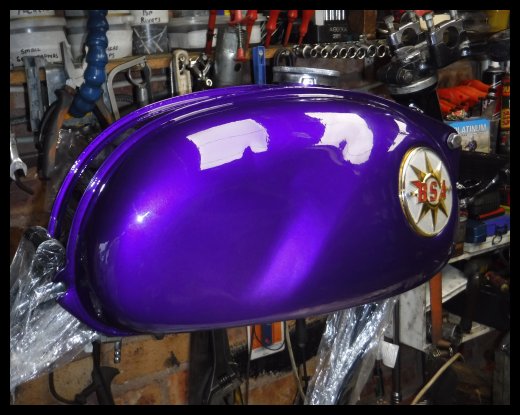
Remember that petrol tank that I messed up earlier on ? Well
after a bit of faffing about I finally got the hole down to the correct size for
the petrol tap. A quick test with a pint or so of petrol proved that there
were no leaks, so it was time to try the tank on the frame. Because of the
lug for the steering lock, the tank has to be spaced out to the right otherwise
the lug will hit the seam. This isn't a problem with the earlier tanks,
but the "jelly mould" tanks have the seam in a different place. After a
bit of fettling, I got the tank to sit on the frame with the bottom yoke of the
steering head missing the seams on both left hand and right hand full lock.
So that can now be put on one side whilst I carry on with the rest of the bike.
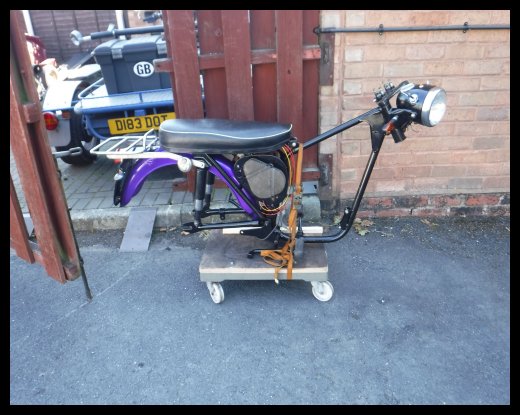
Whilst waiting for the front end to come back, I carried on with
wiring the rest of the bike up. To make life easier, I sat the frame on a
little trolley ( it used to be used for wheeling bread baskets about ) which
means I can at least move the thing out of the way when I need to work on other
bikes. The other thing about having the frame on the trolley meant I could bolt
the engine in place. With the engine in the frame, I rigged up my remote
fuel tank and started the engine. It runs with no rattles or bangs, and
the charging system works . . so that's a big step in the right direction.
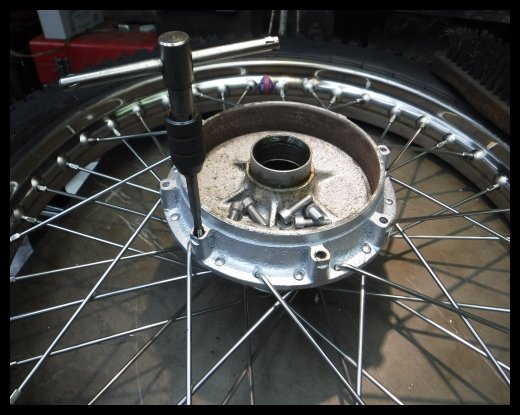
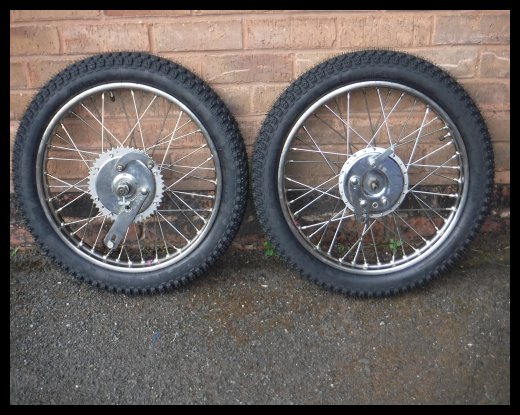
The wheels have now come come back, so the first job was to get some new
tyres and tubes fitted. I've gone with Mitas - I've got them on other
bikes and they seem fine. Following that I did my rear sprocket bolt
modification. I've had the original BSA bolts work loose on more than one
Bantam, so what I do now is to tap the bolt holes out to M6 and fit longer M6
Allen pins in. It doesn't work if you use M6 bolts, the heads are too
large and will foul on the brake plate. New wheel bearings and brake shoes
were also fitted - the peg spanner I made earlier came in useful again.
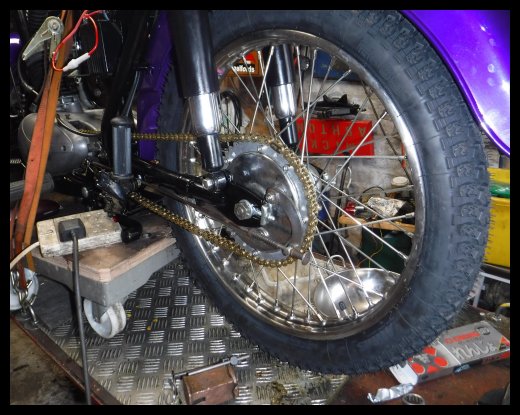
Seeing as I now had the wheels, I fitted the rear one in place.
Whilst I was working on the rear wheel, I might as well fit the chain and chain
guard, which I did. The frame was still sat on its trolley, waiting for
the fork stanchions to arrive. . . .which they did. Right - next job was
putting the front end back together. This is made a lot easier if you have
a fork stanchion puller. Not the most difficult of tools to make,
providing you have an old fork top nut. I made one of these a few years
back when I had another B175 - take a look at
THIS PAGE
for details on how to make one. Having got the forks fitted, the mudguard was
next. I'm afraid the rivet counters will not be pleased because I used
stainless steel metric fasteners to hold it all together. There again, as
you will have gathered, I build bikes to be practical as opposed to factory
original. Next thing was the front wheel. This too has had new
bearings and brake shoes. Of course, seeing as I'm using non-standard
brake and clutch levers, new cables have to be made for both front brake and
clutch. I tend to make two of each - one to fit on the bike, and one to
carry as a spare.
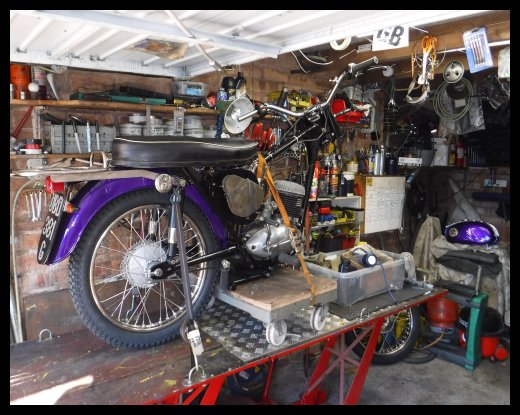
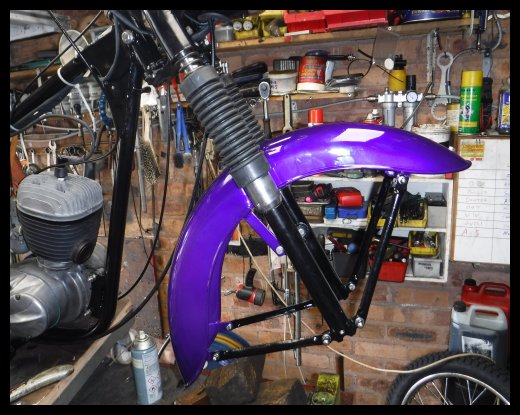
Having done all the above, I wheeled the bike outside and started
it. Pulled the clutch in, engaged first gear and the Bantam moved under
its own power for the first time. The bike is almost finished now, but
there are still little things to be sorted out. A new exhaust system for
one. The decals for the side panels ( still waiting for 'em ) need putting
on. The little matter of insurance has to be sorted out, then an MOT
test. OK, so I know according to its age it doesn't need one, but I'd
rather my friendly MOT tester spots something I'd missed. There's a good
chance the brake cams have worn the holes in the brake plate oval - I need to
see how it behaves on the road before I go making bushes and sorting that out.
Hopefully the next thing I need to do is use the thing and run it in - staying
local for a few "shakedown runs" before attempting any serious distance.
Still, this is all part of the fun in owning a Bantam . . . or so they tell me.
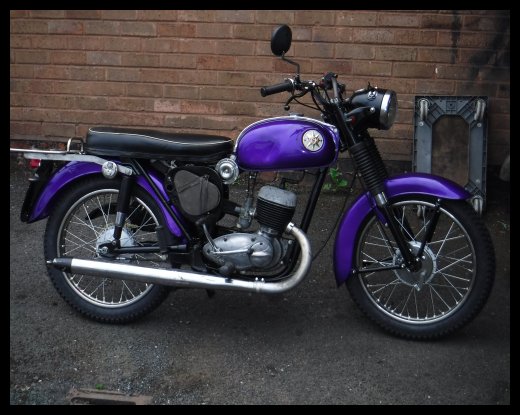
The bike has now been out on a few shakedown runs. The
brakes are working fine, so I won't be re-bushing the holes just yet. The
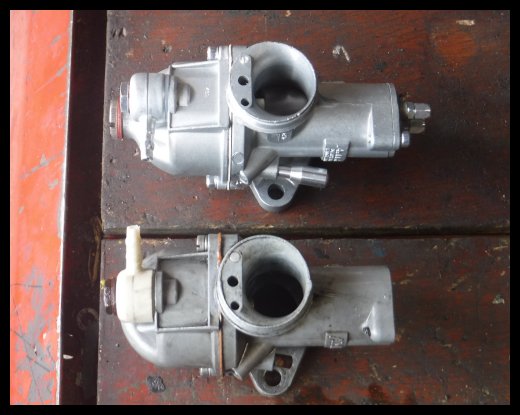
carburettor however is a different matter. It's rather worn, rattles a bit
and is running far too rich. Time for a new Amal Premier I think.
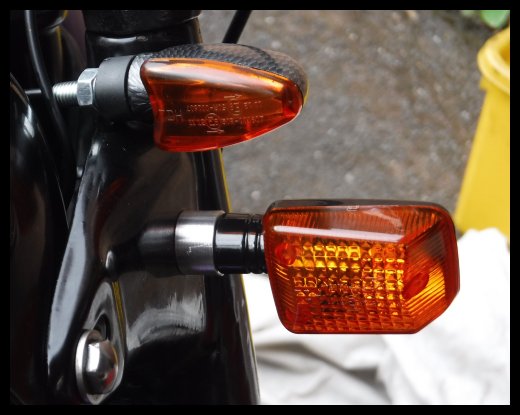
I'm not happy with the shape of the indicators, they may look fine on a modern
bike, but they just don't suit the Bantam at all - so they will be getting
changed.
Like I said, a new Amal Premier has been fitted. It was a
bit weak on the pilot side, so I fitted the next largest pilot jet, that's made
things a lot better. One of the things I try to do with any bike I intend
using, is to find out how far it will go once the fuel tap is turned onto
reserve. I filled my one litre fuel bottle up and set off for a ride
around the Severn Valley. From going onto reserve to running out fully
took 23 miles. Funnily enough, the reserve capacity is also one litre.
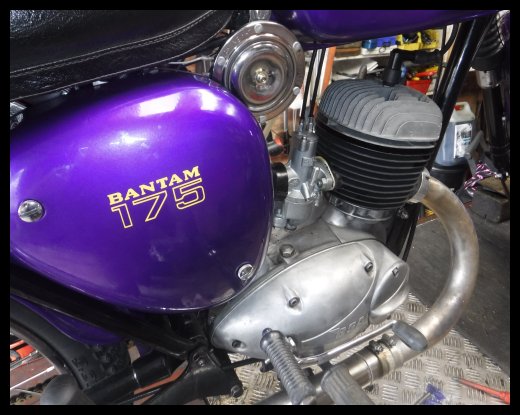
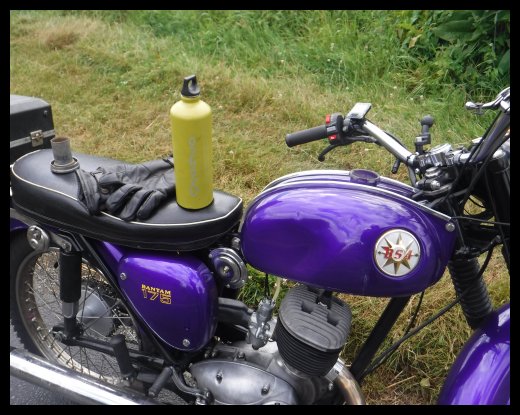
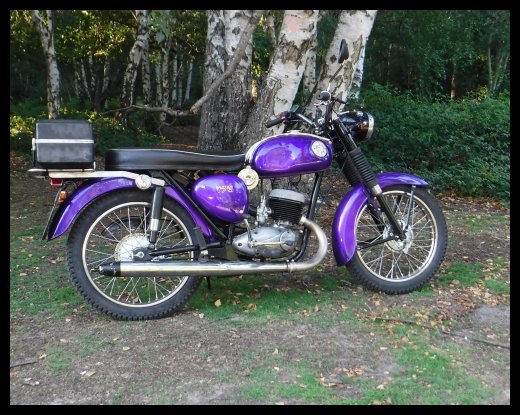
This means the bike was doing 104 miles per gallon. The new decals for the
side panels arrived, so they got fitted too. Now some of the more keen
eyed folks will have noticed an earlier picture of the side panels with the
decals fitted . . . go take a closer look . . . they are fitted incorrectly and
would have been sloping down at around 30°. That'll teach me to look
before I fit next time. The only thing I'm waiting on now is the new
exhaust system.
December 2021
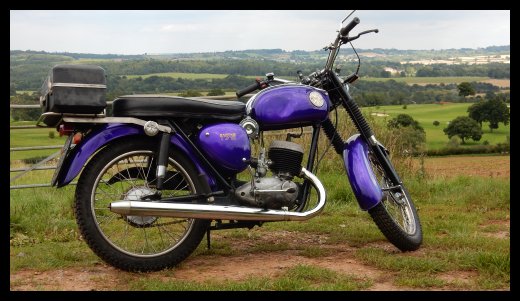
The new exhaust got fitted - along with a GPS speedometer ( which
you can't see during daylight hours, so that might be getting removed ) and a
LED headlight unit. I've also built a 185cc engine which is currently
sitting on the bench waiting to be fitted. I dare say I'll get around to
that sometime next year.
November 2022
Well the 185cc engine
never got fitted - although I've just bought another Bantam frame, so it might
be going in that. This year's Bantam Club national rally was at Kelsall,
where the Bantam made an appearance. I did take the Bantam down to the Ace Café, in London,
for their Bantams at the Ace day. I made it there and back without any
trouble at all. I did call in at the old BSA factory on my way back home.
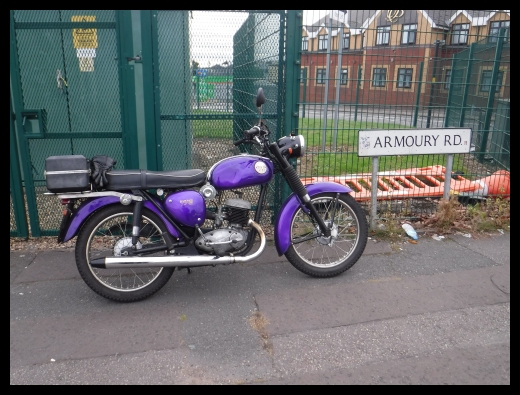
November 2023
Once again the
Bantam went to the National Rally, this year being held at the Bloxham steam
fair. The Bantams at the Ace Café event in September was attended.
The Bantam made the 250 mile round trip with no bother. It seems the
Bantam will also be at the NEC in November for the Classic Motor Show. So all in
all, the Bantam has had a decent year. Oh, and I've got around to taking a
look at sorting the 185cc engine out too.


